Which image is inside your icon?
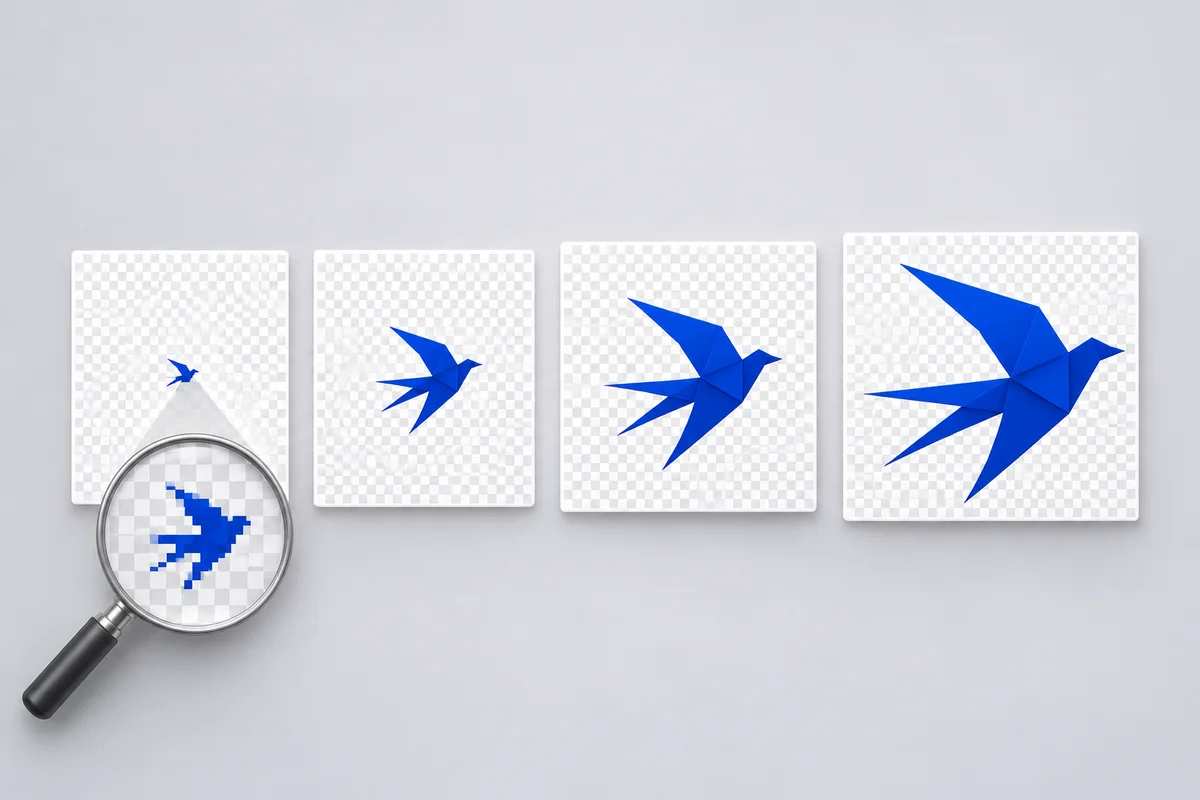
An ICO to PNG conversion begins with a choice. A website icon can hold a carefully drawn 16-pixel symbol, a different 32-pixel drawing and a much more detailed picture for larger displays. Open the file and look at the entries before deciding which picture belongs in your document, design or website.
A small drawing sometimes has the clearest silhouette. An artist may have thickened a bird's wing, removed a window from a little house or widened the space between two letters so the mark reads at its intended size. Those decisions survive when you extract the original entry.
Start with the place the picture will appear
For a toolbar, check the icon at the size of the actual toolbar button. For a help article, measure the space beside the heading. For a design archive, take all entries. An ICO to PNG export preserves those choices so a designer can compare them later without reconstructing the original Windows file.
A useful comparison at actual size
Imagine three versions of a lighthouse. At 16 pixels the lamp is a single bright square. At 32 pixels it has a roof. At 256 pixels you can see the rails. Zoom reveals how each was drawn; returning to actual size tells you which one readers can recognize. Both views answer useful questions.
Extract one size, the largest image or the whole set
Drop an icon into TinyImagePro and check the dimensions beside each preview. Select a particular entry if you already know the required size. Download the largest original if you need room to place the picture on a slide. Select all entries when someone else will decide where each version belongs.
What the largest original means
Width times height gives the number of pixels in each image. A 48 by 48 entry contains 2,304 pixels. When that is the largest one in the file, 48 by 48 is the largest original available. Creating a 256-pixel image from it would involve a separate resizing decision.
When two entries have the same dimensions, the previews can still differ. One might have soft translucent edges while another uses a small palette. The ICO to PNG tool retains both entries in a full export. Check their edges on the background where the icon will eventually appear.
Choosing between two equally large entries
The default largest-image choice favors the higher known bit depth when pixel counts match. Select a different entry if the lower-depth version is the one that matches an old interface. For a migration project, downloading both costs little and preserves a record of the artwork used by different versions.
Why an ICO can hold PNGs and bitmaps
An ICO is a container with a directory of images. The directory points to the data for each entry. Some entries already contain PNG images. Others hold Windows bitmap data with palette or transparency information. A single ICO can combine both arrangements, especially when the original was prepared for several display sizes.
What happens to an embedded PNG?
A valid embedded PNG can be extracted directly. Its compressed bytes can remain identical to the entry in the container. This makes ICO to PNG extraction particularly useful when you have lost the standalone artwork but still have the finished icon shipped with a product.
Bitmap entries take a different route. Their pixels and transparency are interpreted and written into a new PNG. The output file can have a different byte count from the source entry even when the picture looks exactly as intended. For these entries, compare dimensions, colors and transparency.
How to inspect very small icons
Use a checkerboard to reveal the transparent corners, then place the file against a solid light and dark surface. A light fringe that disappears on white may stand out next to dark navigation. Keep a preview at one hundred percent nearby; extreme zoom can make ordinary pixel steps look like damage.
Batch ICO to PNG extraction with repeated filenames
Website folders often contain several files called favicon.ico. The name tells you little about their origin. Keep the original folders until you have verified your export. Add the icons together and use the grouped result view to inspect each source before downloading a ZIP.
Keep each source together
Each source gets its own folder in the archive. Inside it, the filenames identify the dimensions. If two sources share a name, a suffix distinguishes the folders. Two entries with the same size inside one source also receive distinct names. You can extract the archive on a case-insensitive filesystem without silently replacing one picture with another.
Consider a documentation team collecting an icon from a staging build and an icon from a release build. Both contain a 32-pixel entry. After a batch ICO to PNG export, put the two matching dimensions side by side and compare the artwork. A difference at one size does not imply that every other size changed.
A handoff that stays understandable
Before sending the ZIP to a colleague, add a short note outside the archive identifying which source folder came from which build. Leave the dimensions in the image filenames. Someone working on a phone layout can find the small variants even if they never opened the source application.
Preserve transparent and partially transparent edges
A transparent corner has a different purpose from a white pixel. When you place a PNG on a blue navigation bar, the blue should show through the corner. A semi-transparent pixel at the rim should blend with the blue. Inspect both the outside corners and the curved edge of the design.
Working with older Windows artwork
Some older icons store visibility in a separate mask. A pixel may look black if a viewer treats the underlying color as the whole image and ignores the mask. Other entries carry partial opacity in their pixel data. Decoding the entry using its actual storage type helps preserve the appearance of both kinds.
A checkerboard baked into the artwork will remain visible after extraction. Try the exported PNG over a contrasting solid color and see whether the squares change. If they remain, the pattern is part of the picture. Recover a source with genuine transparency if your layout needs a clean edge.
Check the file before you hand it over
Choose one small entry and one large entry, save both and reopen them. Confirm the pixel dimensions in the image inspector and compare them at the display size of your destination. For a full ICO to PNG archive, also compare the number of valid entries reported on the page with the number of image files in the ZIP.
When a file or entry is unreadable
A file extension can be changed without changing what is inside. A PNG renamed to .ico still has a PNG header. Windows cursor files and application executables also have their own structures. Start with an actual icon file from the project's assets if the tool reports that the selected file has another format.
A damaged directory can prevent the entire icon from opening. An individual damaged entry can affect just one size. Read the result beside the source filename before packaging your images. If a client specifically needs the damaged 32-pixel design, ask for another copy of the source instead of substituting a larger version without telling them.
Extracting a symbol for a presentation
A presentation might call for an icon beside three lines of text. Start with the largest intact entry and place it at the intended physical size on the slide. Check the exported presentation on a second screen. If the symbol looks soft, request the original vector artwork or choose a smaller placement.
Build an icon handoff that survives a design review
A designer has asked for a toolbar icon, a help-center illustration and a record of what came from the old application. These are three different deliverables. Open the icon directory once and choose each output by its purpose. Keeping the native versions together makes a later review much easier.
| Destination | What to take from the icon | Detail to inspect |
|---|---|---|
| Small toolbar | Native entry closest to the display size | Corners at actual size |
| Illustrated guide | A larger entry with enough detail | Edges over the article background |
| Design archive | All usable entries in their source groups | Unique names and original dimensions |
Put the sample on a real background
Place the smallest PNG on the color used by the application. Step back to normal viewing distance and check that the outline reads at a glance. A white fringe that was invisible on the checkerboard may be obvious beside a dark toolbar. Repeat with the larger version on the background of the help article.
Record a choice the next designer can repeat
Add the source icon name and entry dimensions to your handoff note. When a contributor asks which file to replace, those two details point to a specific piece of artwork. A screenshot of a magnified icon can help explain the choice, while the extracted PNG remains the working asset.
Questions about ICO to PNG downloads
Can I get a larger version than the list shows?
The list describes images stored in this particular container. A file that tops out at 32 pixels may look fine in a browser tab yet look rough in a printed guide. An ICO to PNG export gives you the original pixels. Artwork with finer detail must come from a larger original or a new drawing.
Which file should go back on my website?
Check what the destination expects. A page builder asking for a PNG usually accepts one standalone square image. An older integration requesting favicon.ico expects a container. Keep the source ICO until you have tested the new asset. To build a fresh multi-size file from artwork, use the PNG to ICO tool.
Can I convert an entire application icon collection?
Process the ICO files in groups within the limit shown beside the file picker. The icon tool accepts up to ten files in one batch. Download one group, check its folder names and then begin another. This is easier to audit than combining similar-looking pictures from several applications in one working folder.
What should I save for future changes?
Keep the original container alongside your chosen PNGs. Note the source application, the selected size and where the new image is used. An extracted toolbar glyph can then be replaced when the brand changes, while the original remains available for old screenshots and documentation that need to reproduce a particular release.